Panoramic Images
A Panoramic Photograph can be described as a wide angle photograph of an entire surrounding area. It is basically a representation of an entire physical space in a single image. Generally Panoramas are created by capturing the images in a row with each image slightly overlapping the previous image. Capturing 360-degree panorama requires shooting of multiple rows of photograph covering the entire scene.

Photographing a Panorama is certainly not difficult. But for the best results following a few guidelines are recommended:
1. All the images that we take for a single Panorama must be taken from a single viewpoint in order to avoid Parallax. Parallax is an effect where two objects appear to change positions relative to each other when viewed from different viewpoints. It causes relative movements between the objects which causes a shift in the position of foreground objects relative to the background objects. This relative movement caused by parallax that prevents these images from being properly stitched. Many panorama stitching programs can attempt to align the background or the foreground object but can’t align both at the same time. Even worse is that the program might try to align the foreground objects which would end up throwing the other parts of the panorama out of line resulting in small stitching errors throughout the panorama.
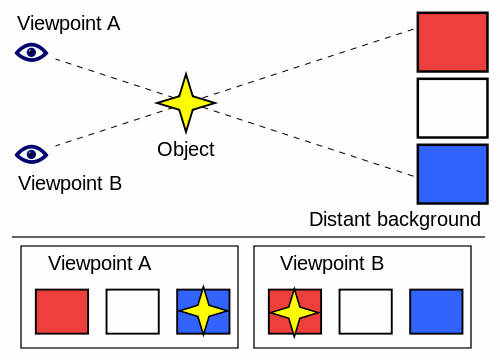
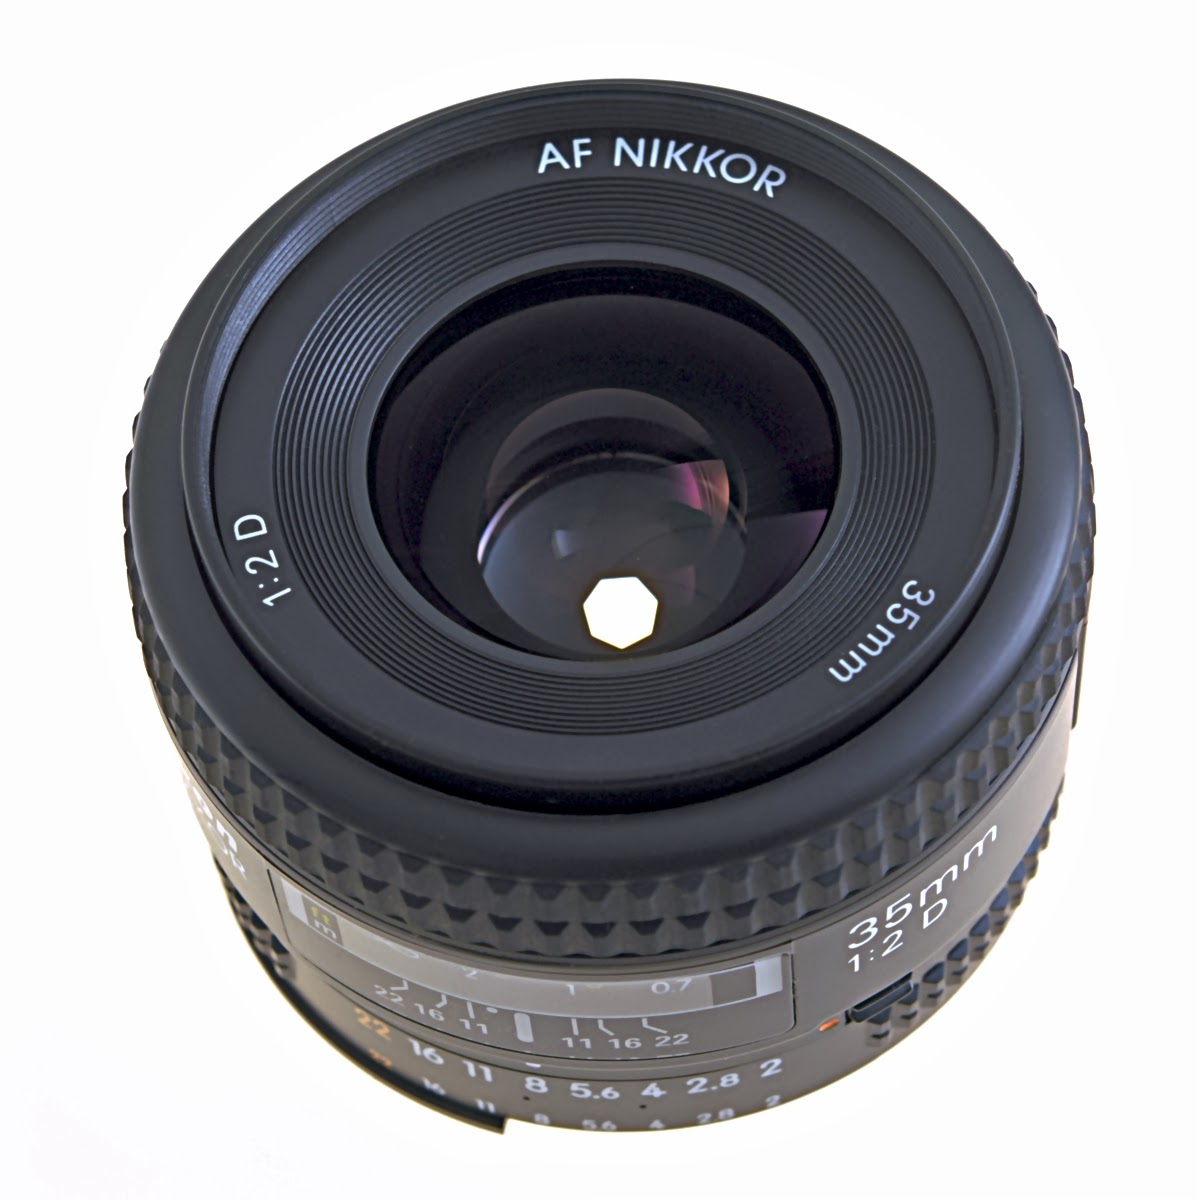
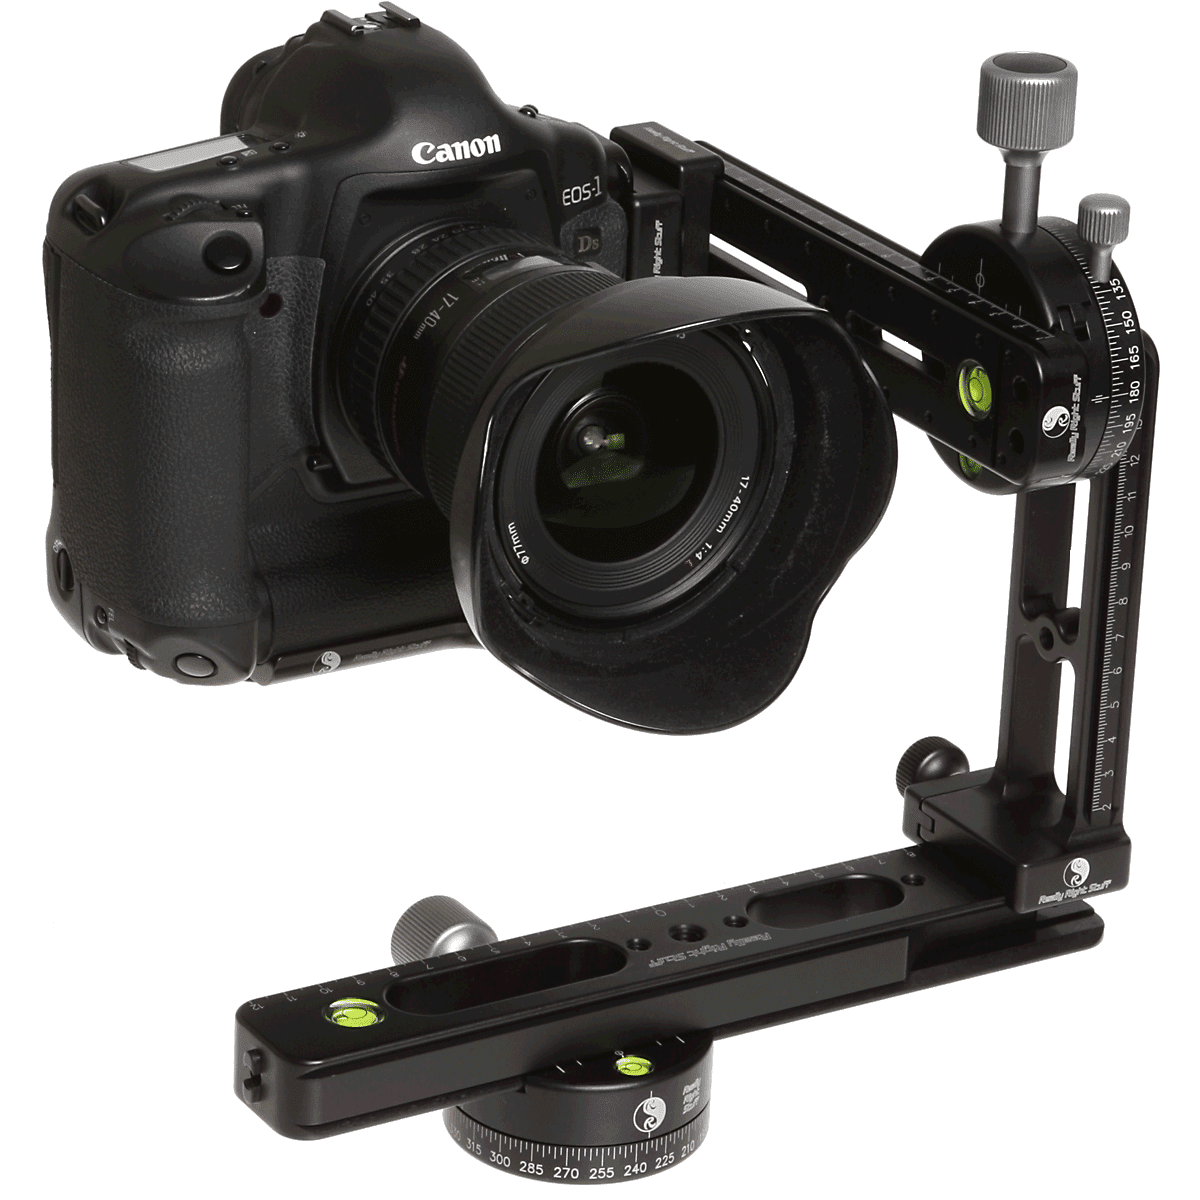
2. So it is very important to avoid Parallax. And in order to do so we have to capture images from a Single Viewpoint. Every lens has a specific viewpoint which is the entrance pupil, it is also referred to as no parallax point. The exact location of this point differs between lenses but in general the viewpoint tends to be very close to the front of the lens. So if we place our camera directly on the tri pod and rotate it we can see the front of the lens is actually moving this results in a change of viewpoint which can some really bad stitching problems. So to prevent parallax errors the camera should rotate around the front of the lens.
3. To do this we use a Panoramic Head which attaches to the top of the tripod and allows the camera to be rotated around the lens. We can still take good panoramas without the panoramic head as long as we remember to rotate the camera around the front of the lens. Photographing hand held means that you have to move yourself around the camera, instead of the camera rotating around your body. For landscape panoramas where objects are not close to the camera we can actually get good results without a panoramic head but for indoor panoramas we definitely need a panoramic head in order to avoid the parallax effects.
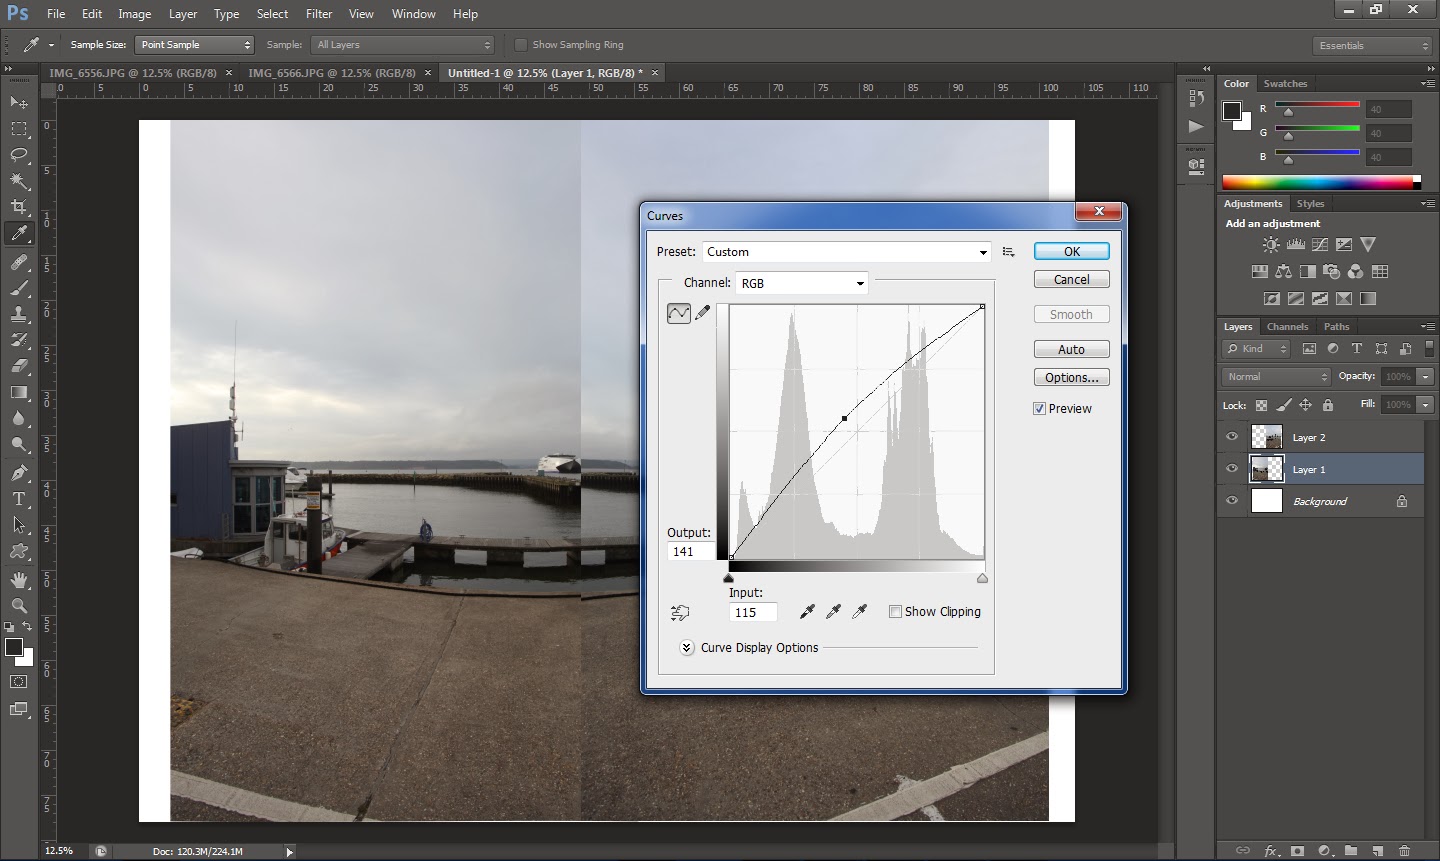
4. Getting a Balanced Exposure for the entire batch of images comprising a Panorama is really necessary as most of the panorama stitching programs requires the images to be taken at same exposure. Variation in exposure might end in patches around certain areas of the Panorama image. So it is always recommended to capture a shot with the accurate exposure that we would like to target and then correctly balancing the exposure of each image according to that in any image editing program.
Now we are ready to go ahead and Stitch up a Panorama from the images captured by following the above points. We can use any program available in the market for stitching up a panorama as long as it provide good results. But in this lesson we are going to learn how to use Adobe Photo-shop for quickly and easily assembling panoramas.
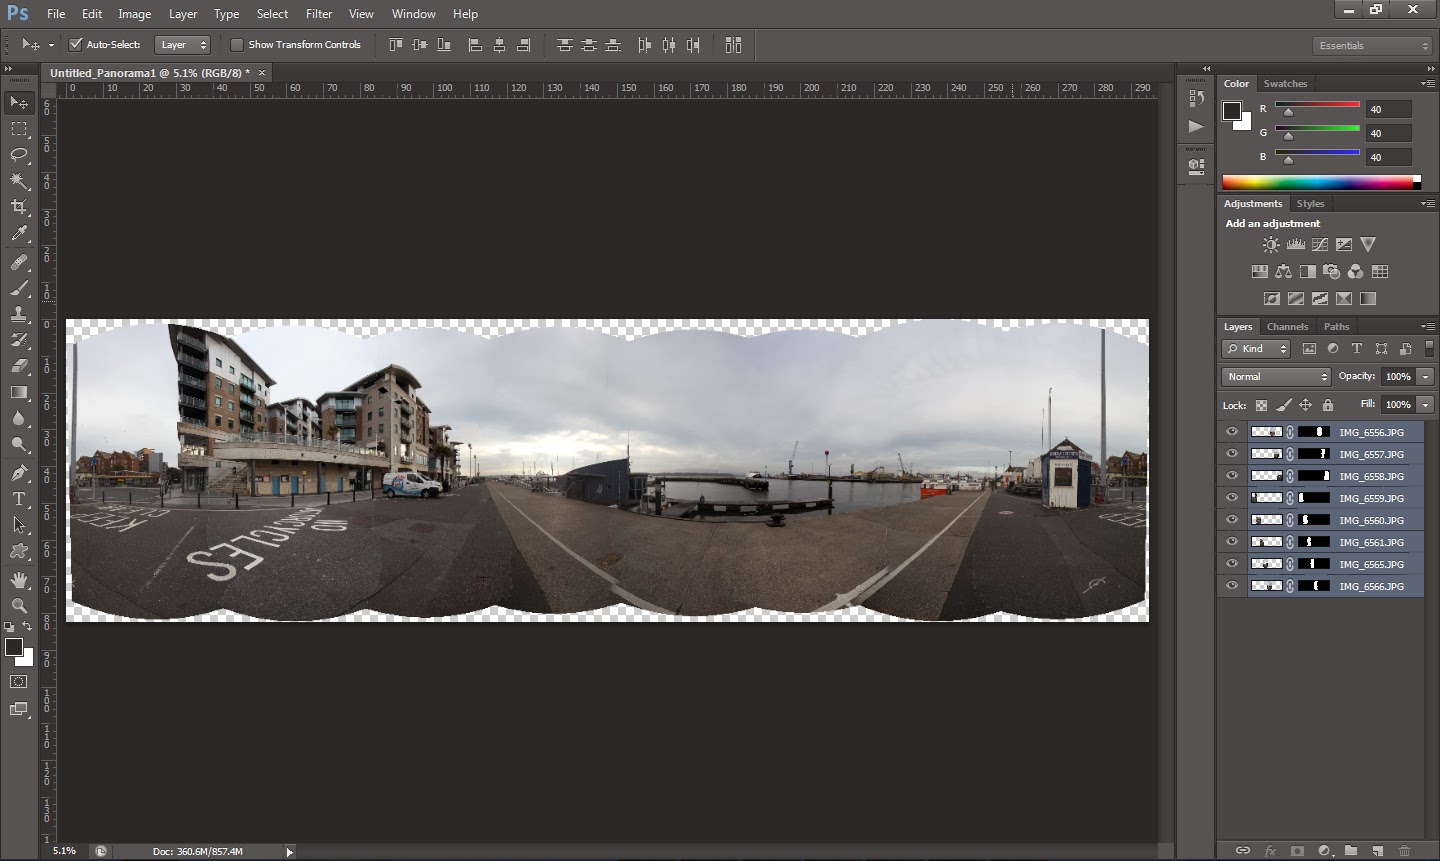
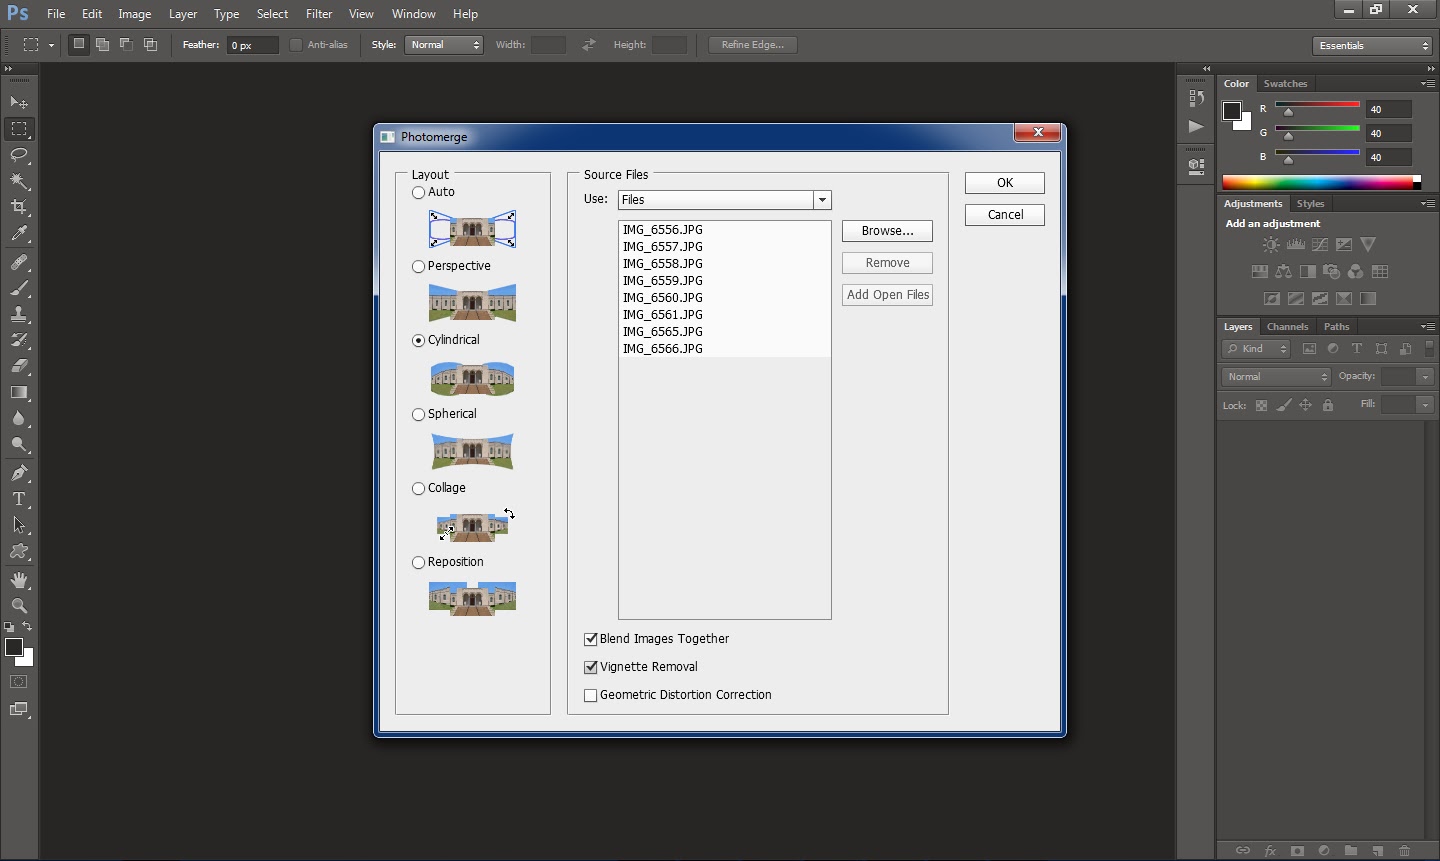
01 Fire up Photo-shop and choose ‘Photo-merge’ tool from the ‘Automate’ options inside the ‘File’ menu, (File > Automate > Photo-merge). This will open the Photo-merge Dialogue Box containing the options for creating a panoramic image.

02 Under Source Files in the ‘Photo-merge Dialogue Box’ choose files in order to generate the Photo-merge Composition using individual files. Hit ‘Browse’ button in order to navigate to the images located in our hard disk and then loading them into ‘Photo-merge Dialogue Box’ by hitting the ‘Ok’ button on the browser after selecting the images.

03 Select the ‘Cylindrical Layout Option’ in order to merge the images according to the surface of an unfolded cylinder. This layout is best suitable if we want to apply this onto the surface of a cylinder inside any 3D Program.

04 Select ‘Blend Images Together’ and ‘Vignette Removal’ from the Photo-merge Dialogue Box options in order to merge the images by finding the optimal borders between the images, creating seems based on those borders and to perform exposure compensation in images that have darkened edges caused by lens flaws or improper lens shading.
05 Hit ‘Ok’ and wait until the Photo-shop automatically creates one multilayer image from the source images, adding layer masks as needed to create optimal blending where the images overlap. We can edit the layer masks or add adjustment layers to further fine tune the different areas of panorama.