Image Based Lighting
In this lesson we are going to learn how to produce realistic looking renders using Image Based Lighting. IBL is basically a 3D Rendering Technique which involves attaching a HDR Panoramic image of the same environment to a spherical dome or skylight. The HDR Panorama contains the environment lighting and content information of the scene. So while rendering the scene with global illumination and final gather, most of the 3D Programs take into account the lighting characteristics of the surrounding surfaces with the help of HDRIs.

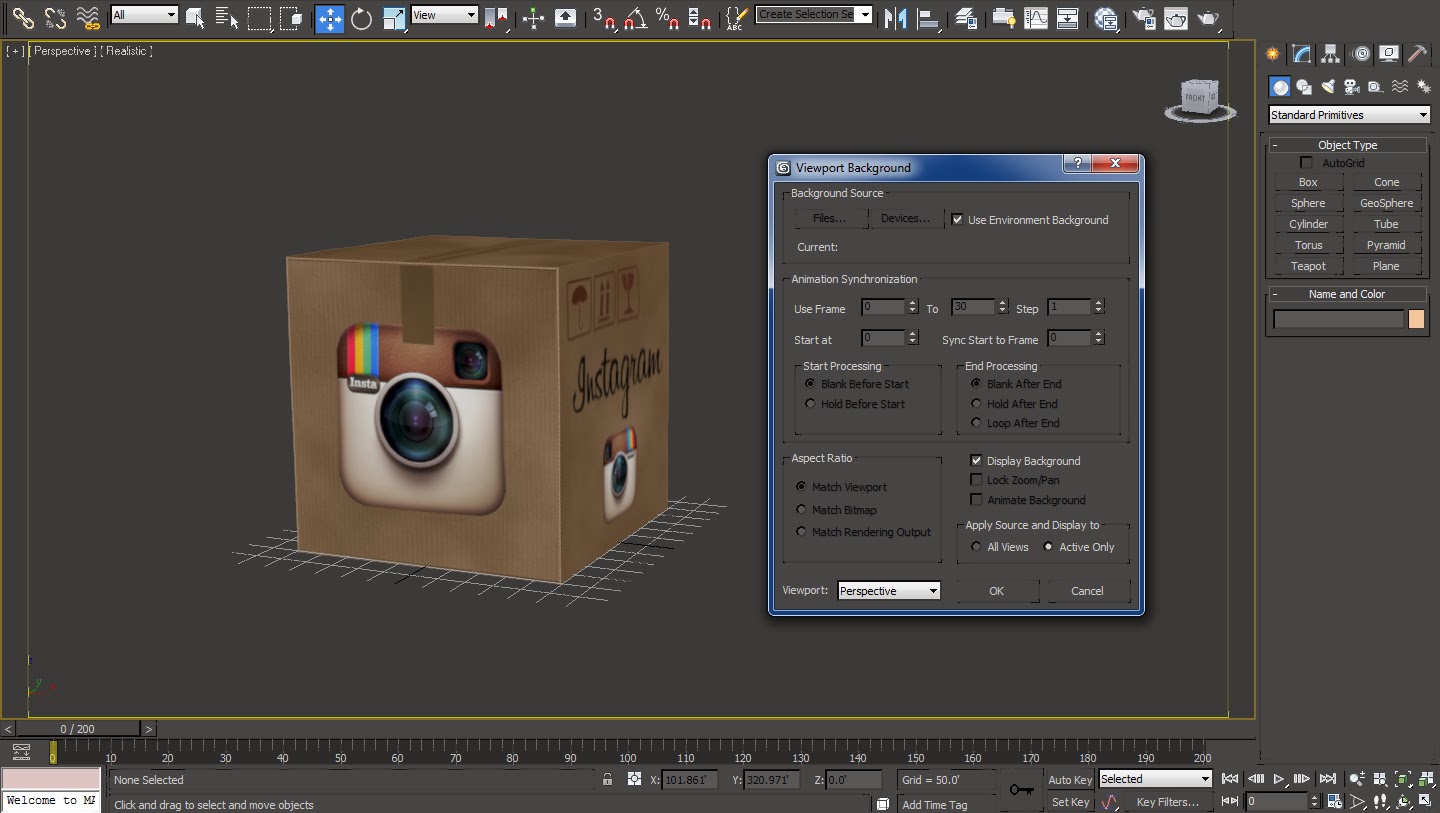
01 Fire up 3DS Max and open up the ‘Cardboard Box’ scene that we animated in one of our last lessons. We will start lighting up our scene by importing our Back-plate as an ‘Environment Map’ available inside the ‘Environment and Effects’ dialogue box. A Back-plate can be an image or a video that will form the background of our scene.

02 Turn on ‘Use Environment Background’ and ‘Display Background’ inside ‘View-port Background’ dialogue box accessible through ‘Alt + B’ keyboard shortcut. These options will helps us to display the ‘Environment Map’ inside the view-ports.
03 Now we will align our 3D scene according to the Back-plate with the help of viewport grid. But before that we will make the grid bigger from the ‘Home Grid’ menu available inside the ‘Grid and Snap Settings’ dialogue box. ‘Grid and Snap Settings’ dialogue box can be accessed by right clicking on any of the snap toggles.

04 Match the grid in the perspective view-port according to the Back-plate by aligning the lines of the grid to the white line on the road and the corner of the road. Also try to match the ‘Field of View’ of the 3D scene according to the Back-plate. Once satisfied press Ctrl +C on the keyboard in order to create a camera on the current view.

05 Turn off the ‘Grid’ display by pressing ‘G’ on the keyboard and create a big ‘Plane’ object in the center of the view-port, defining the ground level of our scene. Assign the ‘Matte/Shadow’ material over it in order to make it a non render-able object while only displaying the shadows of the objects in contact with it.

06 Bring in a ‘Skylight’ into the scene from the ‘Standard Lights’ menu. Inside it’s parameters load in the HDR Panorama Image of the scene from the ‘Sky Color’ menu. Browse the folder containing the ‘Radiance Image File (HDRI)’ and hit ‘Open’ after selecting it. Also hit ‘Ok’ on the ‘HDRI Load Settings’ dialogue box that pops up, in order to load the default settings of the HDRI.

07 Turn on the ‘Cast Shadows’ option of the Skylight and hit render in order to see the effect of HDRI based Skylight with the default scan-line rendering. It will take a long time to render the scene as we are not using any advanced lighting plug-in to calculate the global illumination of the scene. Also the render might come with a lot of patches of noise.

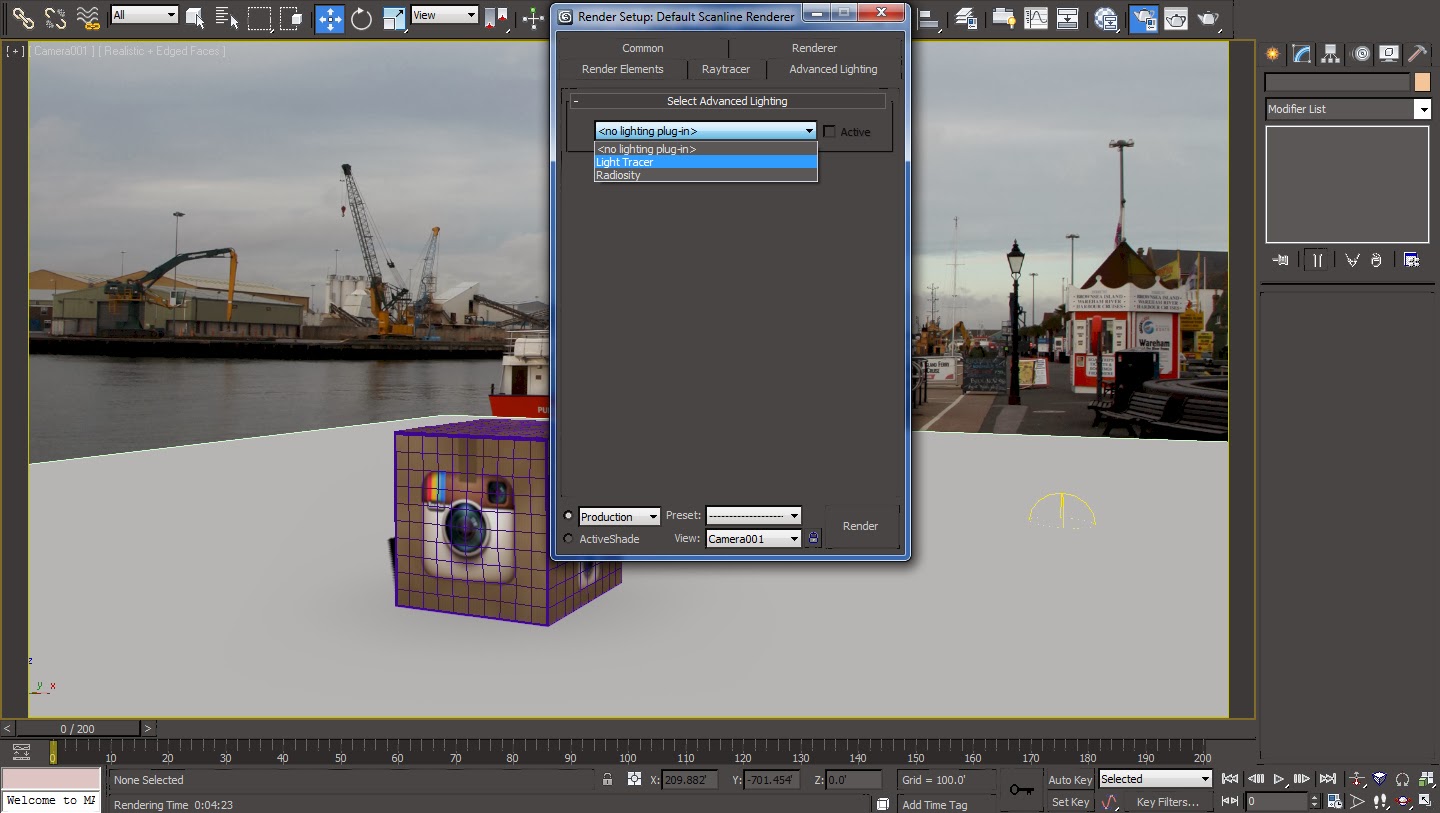
08 In order to improvise the current scene we will take the help of some ‘Advanced Lighting Plug-ins’. Open up the ‘Render Setup Dialogue Box’ by pressing ‘F10’ on the key board and from the ‘Advanced Lighting Menu’ select ‘Light Tracer Plugin’.
09 Just hit render straightaway and have a look at the significant difference that it makes on the render time. And also there is actually a discreet difference between the quality of the render at step ‘7.0’ and at step ‘9.0’.

10 Now we will improve the render time without disturbing the quality of the render. From its ‘General Setting’ menu decrease the ‘Rays/Sample’ to ‘100’ and increase the ‘Filter Size’ to ‘2.0’. Rays/Sample actually means the number of rays cast per pixel of the image whereas the ‘Filter Size’ is actually the size of those rays. So the current settings means that although there are less samples in the scene they are actually bigger so they are going to overlap a lot more.

11 We will further improvise the scene by adding in some shadows to the scene. Grab a ‘Target Direct Light’ from the Standard Lights menu and place it at the top of the scene at an angle that will create a very small shadow. Turn on the shadows and change the shadow type to ‘Area Shadows’ in order to get smoother shadow effect.

12 Improvising the quality of shadows depends on the time spend on playing with Area Shadows parameters. Turn down the ‘Shadow Bias’ to ‘0.0’ in order to diminish the distance between the object and its shadow. Increase the ‘Sample Spread’ to ‘2.5’ in order to soften the hard edges of shadows.