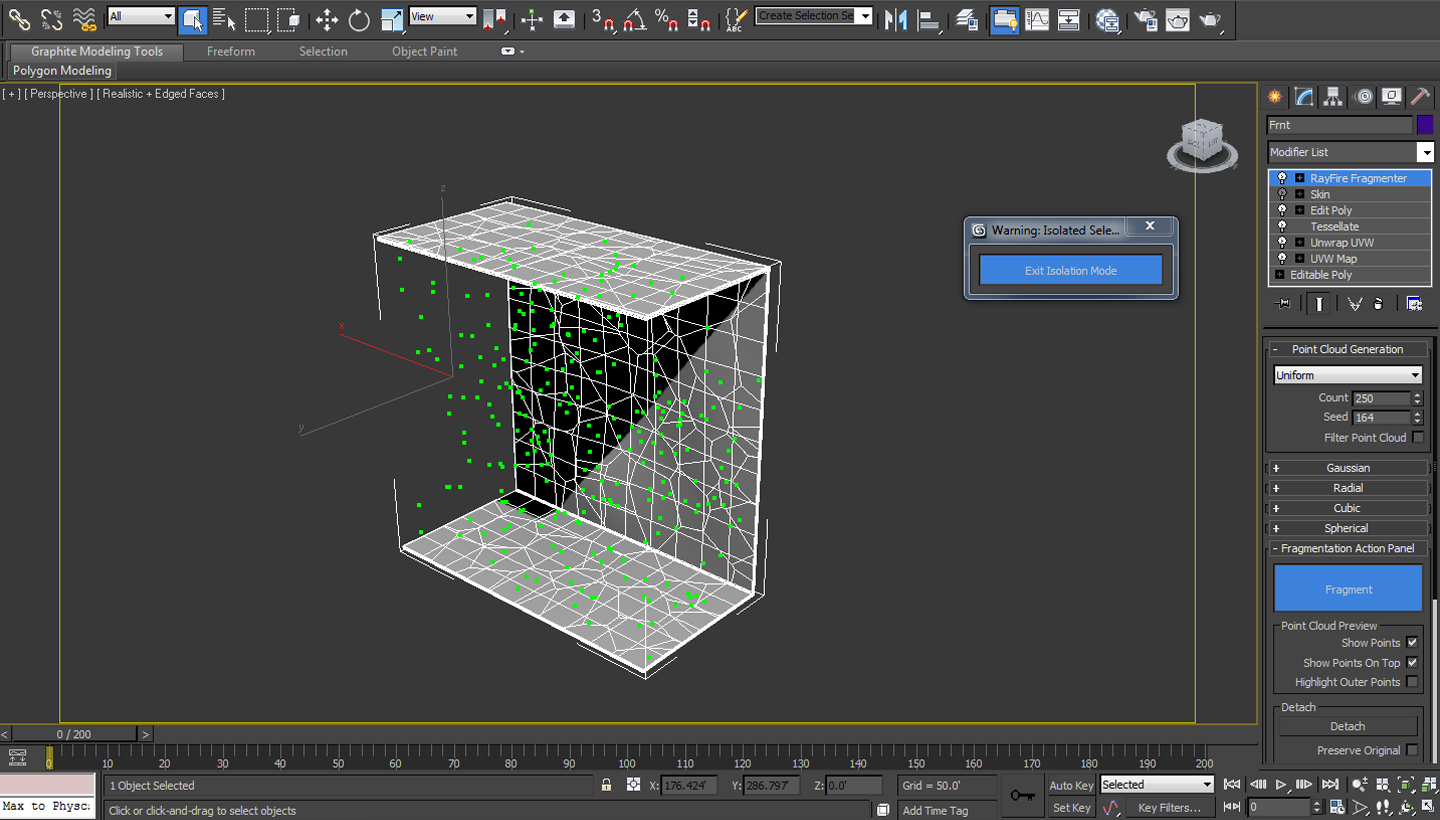
01.1 Fire up the file ’03_Box_Fragmentation_01′ from the project files. We will get a rough animated model of a Cardboard Box unfolding itself. We will now fragment this box using Ray Fire. Select and isolate (Alt + Q) the ‘Front’ part of the Cardboard Box and Apply the ‘Ray Fire Fragmenter’ modifier while disabling the skin modifier.
Fig 01.1
01.2 Increase the Count to 250 and hit Fragment in order to break the box into several parts. Disable the ‘Cap Holes‘ option from the Fragment Generation parameters tab.
Fig 01.2
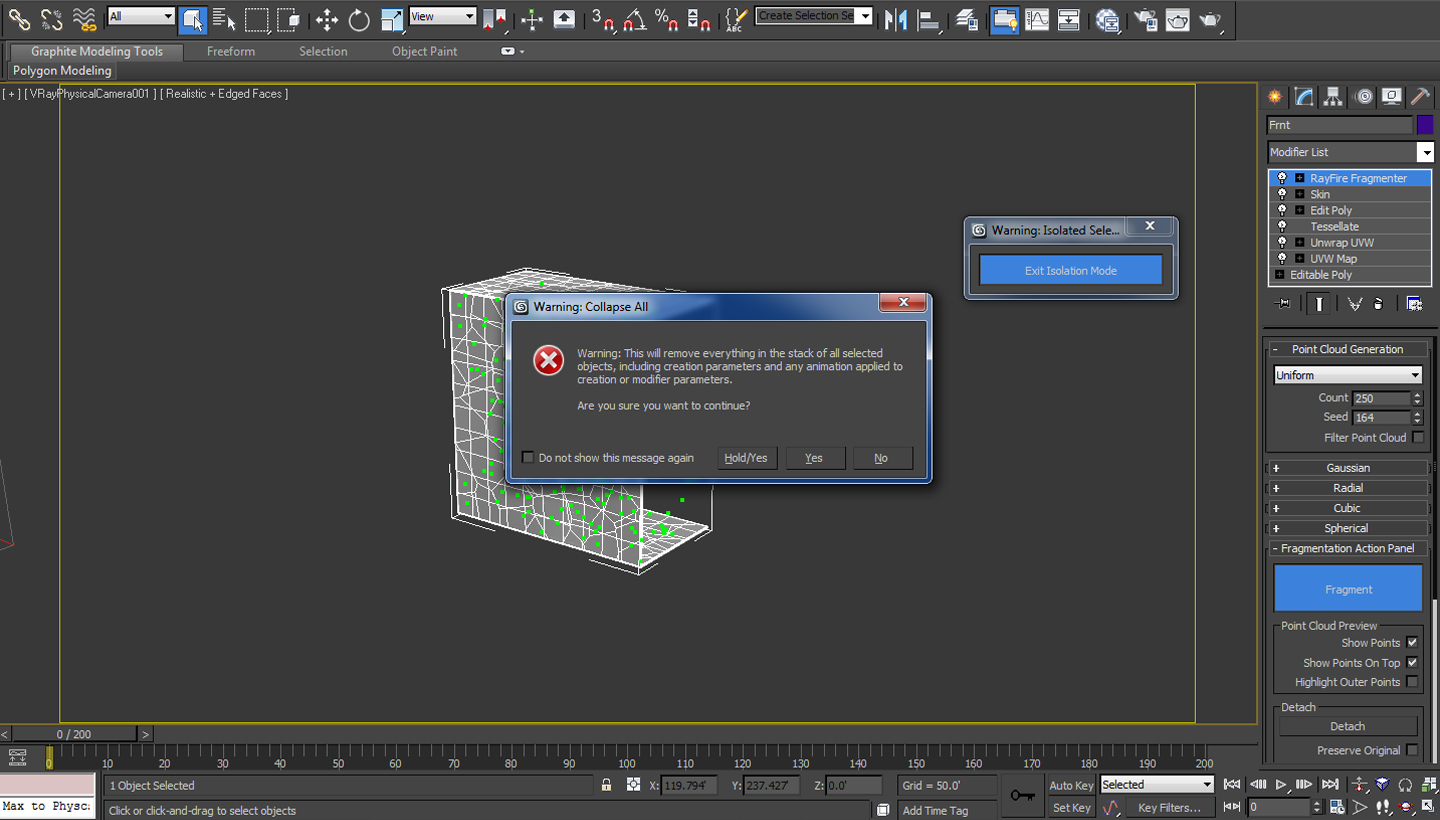
01.3 Turn back on the Skin modifier without touching the playback controls as it can really slow down the processor. Therefore we have to collapse the modifier stack of the cardboard box object by right clicking onto the Ray Fire Fragmenter modifier and selecting ‘Collapse All‘. Hit ‘Yes’ on the Warning message window. This will convert the whole object along with all the modifiers into a polygon mesh.
Fig 01.3
02.1 Now we will apply the Skin Modifier back onto the collapsed object. Unhide all the bone objects with ‘Frnt’ as their prefix, in order to add them inside the bone section of Skin modifier. Select the envelope sub-object from the skin modifier and select the Frnt_Top bone from the Bones list inside the parameters of Skin modifier. Switch to left view and zoom onto the Vertices under the influence of Frnt_Top bone.
Fig 02.1
02.2 Turn on the ‘Vertices‘ in order to enable selection of vertices inside the view-port. Switch to wire-frame mode and select all the vertices from the upper lid. Increase the ‘absolute effect‘ to 1.0 in order to make these vertices completely follow the movement of Frnt_Top bone. Now we will select the verices from the side parts of the box and and decrease the ‘absolute effect‘ to 0.0 for them.
Fig 02.2
02.3 Repeat these steps onto the other parts of the cardboard box as well. Bring the Cardboard box into the center by placing the ‘Vimeo’ helper object into the center. Also create a floor under the cardboard box with the help of a box object. Save the scene file with the name as ‘03_Box_Fragmentation_02′.
Fig 02.3
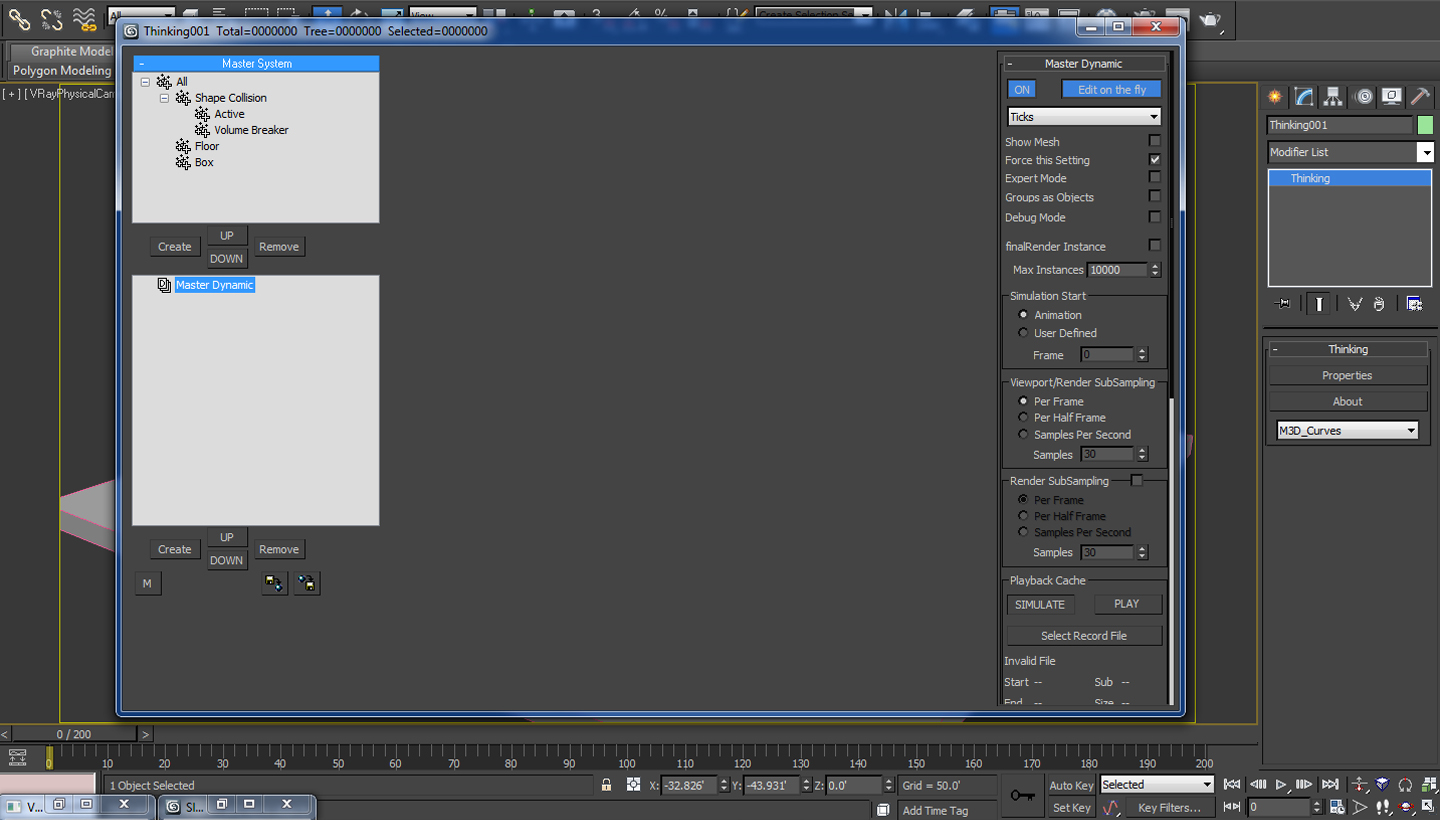
03.1 Switch to ‘Particle System’ Tab from the Geometry Tab drop down menu and create ‘Thinking‘ particle emitter. Hit the properties button and inside the TP Interface create a group with the name of ‘Shape Collision‘. Create another two groups inside this group with the name of ‘Active‘ and ‘Volume Breaker‘. Also add in two groups into the main group with the names of ‘Floor‘ and ‘Box‘.
Fig 03.1
03.2 Now we will create a Dynamic Set with the name of ‘Main‘ and add in another Dynamic Set inside it with the name of ‘Object To Particles‘. Inside this set we will create an ‘Object to Particle‘ generator which can be accessed through the right click menu ‘Operators > Generator > Obj to Particles’. Pick the cardboard box parts into the Obj. to Particle list and select ‘Box’ as the group. Change the Track to ‘Object to Particle‘ and turn on the ‘Instance Shape‘ and hit hide.
Fig 03.2
03.3 Create a copy of Obj to Particle generator by dragging while holding down the ‘Shift Key. Rem the Cardboard Box parts from the list and Pick the Floor object. Change the group to Floor as well. Change the Track to ‘Object to Particle‘ and turn on the ‘Instance Shape‘ and hit hide.
Fig 03.3
04.1 Switch to ‘Main’ dynamic set and enable the ‘Show Mesh‘ option from master dynamics panel. Update the view port by moving the time line a bit.
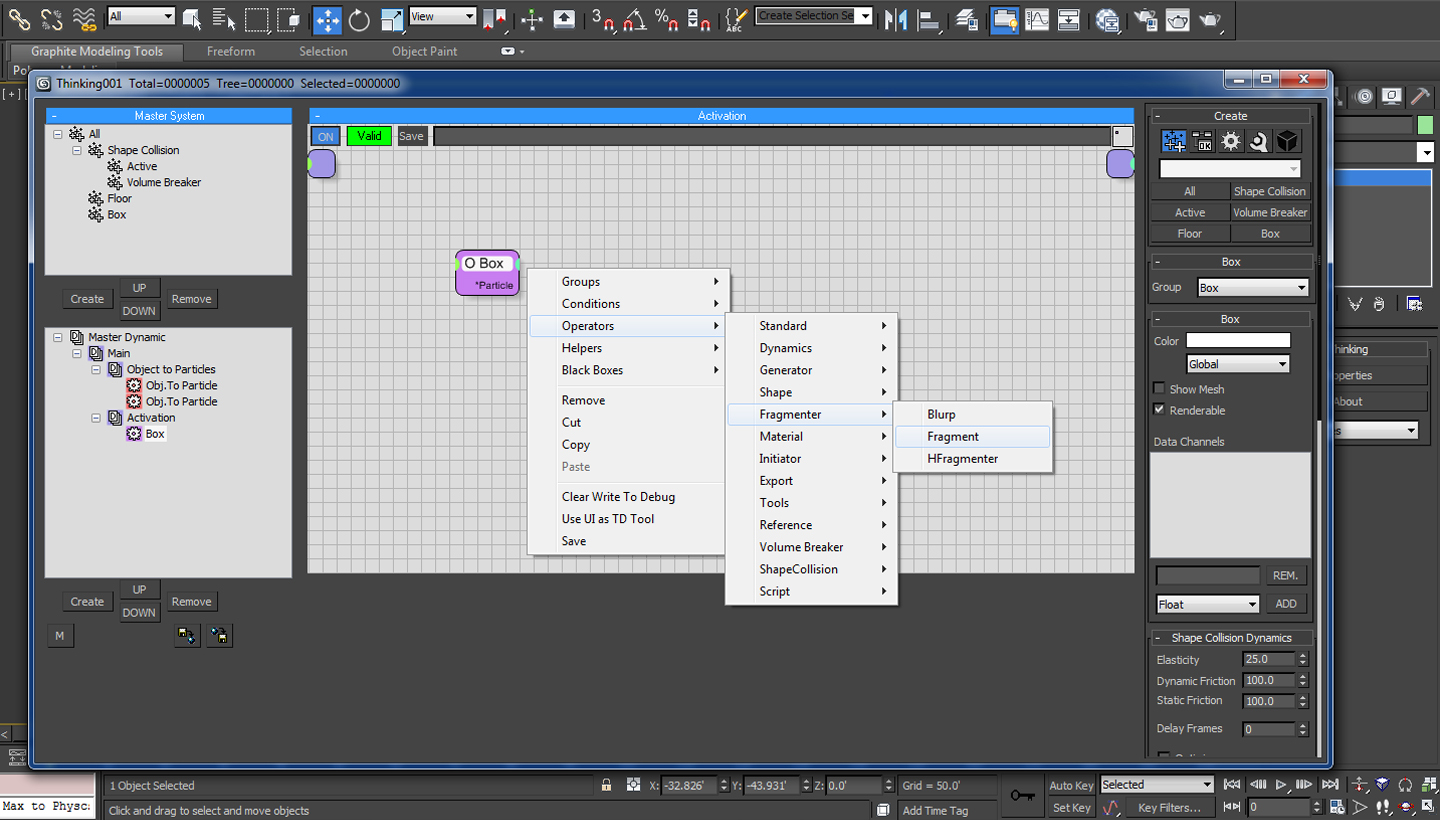
04.2 We will now create another Dynamic Set with the name of Activation. Import the Box group into it from the right click menu ‘Groups > Box’.
Fig 04.2
05.1 Append a Fragmenter operator from the right click menu ‘Operators > Fragmenter > Fragment’. This will help us in activating the fragmentation of the box through one of the several ways this operator provides us with. This time we are going to fragment the box using lights.
05.2 So for that we will bring up a new ‘Omni‘ light into the scene from standard lights roll-out. Bring the intensity down to 0.1 so that it won’t effect the scene. Enable the ‘use’ and ‘show’ parameters for ‘near attenuation‘ and ‘far attenuation‘. Increase the start and end of the attenuation parameters according to the size of the cardboard box as these parameters will act as the fragment activators i.e. the area coming under their influence will get fragmented.
05.3 Create a small animation of the ‘omni’ light piercing the box from ‘frame number 150‘ to ‘frame number 200‘. Switch back to the thinking particles properties interface.
Fig 05.3
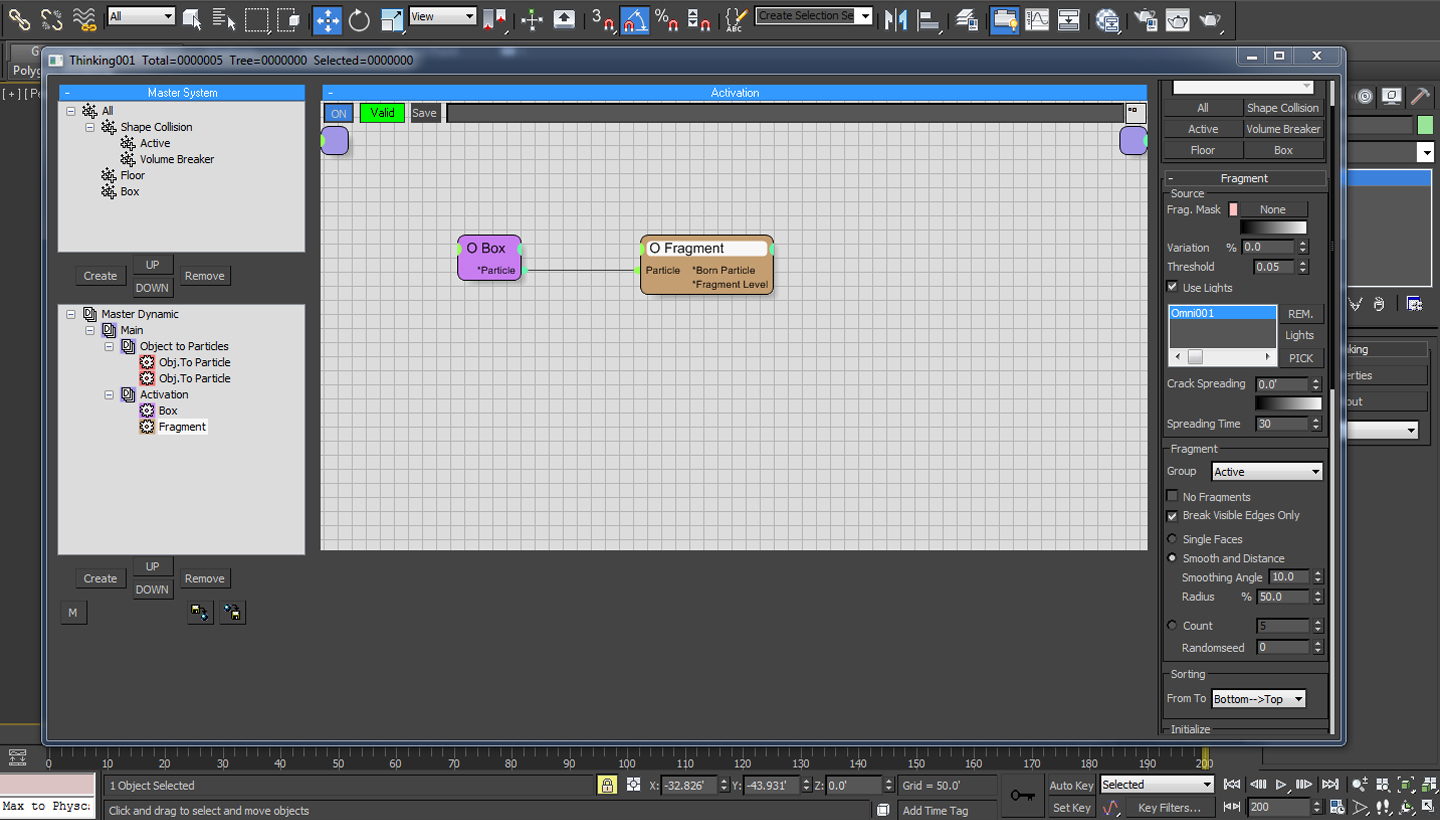
06.1 Inside the ‘Fragment’ parameters enable the ‘Use Lights‘ option and pick the ‘omni’ light from the scene. Decrease the ‘Threshold‘ to 0.05 in order to activate the fragmentation. Change the group to ‘Active‘ group and enable ‘Break Visible Edges Only‘ option.
Fig 06.1
06.2 Also enable the ‘Count‘ and change the value to 1. Increase the ‘Life Span‘ to 999 in order to make it infinite. Decrease the ‘Thickness‘ to 0 % from both the Parameter Sections of Fragment Shape and Remaining Shape. This will forbid thinking particles to add the shell modifier like thickness to the parts.
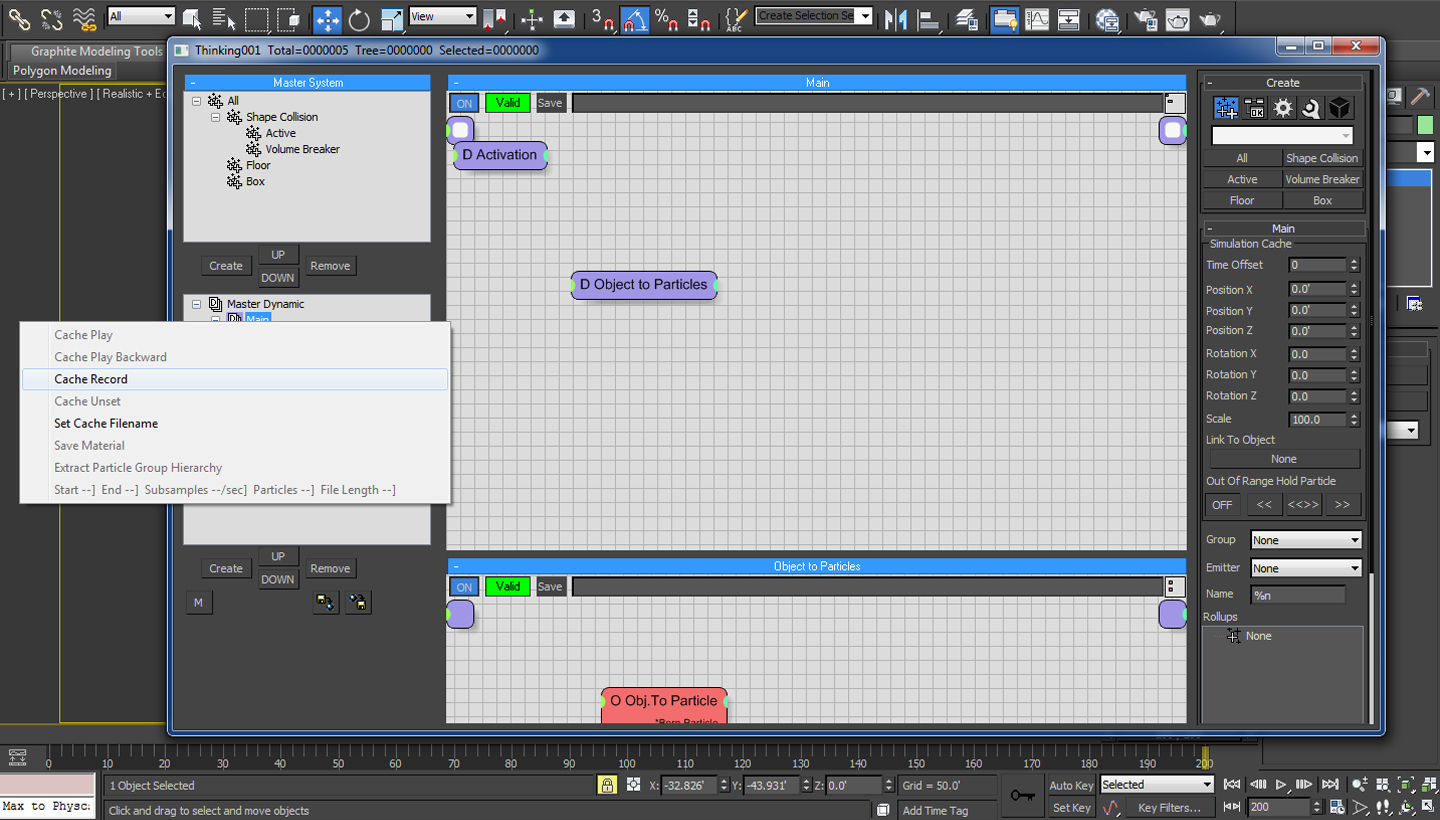
06.3 We are now ready to Cache our scene which we can do pretty easily by just caching up the ‘Main’ dynamic set. Right click on ‘Main’ and select ‘Cache Record‘. We will now browse the folder where we want to save the cached data.
Fig 06.3
06.4 In the end we will change the color of the active group to red. This will help us in differentiating between the parts of the box under the active group to rest of the parts.
Fig 06.4